Setting up Google consent mode v2 on your Webflow site: a step-by-step guide
Google consent mode v2 is essential for ensuring GDPR compliance while maintaining your analytics and ad performance. For Webflow users, implementing consent mode v2 can enhance data collection in a compliant way, balancing user privacy and business needs. Below, we walk you through setting up consent mode v2 on your Webflow site, detailing how our leading cookie solution simplifies the process for developers and site owners alike.
What is Google consent mode v2 and why do you need it?
Google consent mode is a framework that allows websites to adjust how Google tags behave based on the consent status of users. It provides flexibility in how you handle user consent, particularly for ads, analytics, and personalization tags that rely on cookies. With v2, Google has improved consent management, allowing permission of tags to adapt seamlessly based on user consent settings, maintaining GDPR compliance while still enabling essential tracking for business insights. For Webflow site owners, integrating consent mode v2 ensures that:
- Consent is honored before tracking cookies are placed.
- Analytics are collected responsibly without infringing on user privacy.
- Ad conversions and performance data remain accessible, adhering to user permissions.
Step-by-step guide to setting up Google consent mode v2 on Webflow
1. Audit your current cookie banner and analytics setup
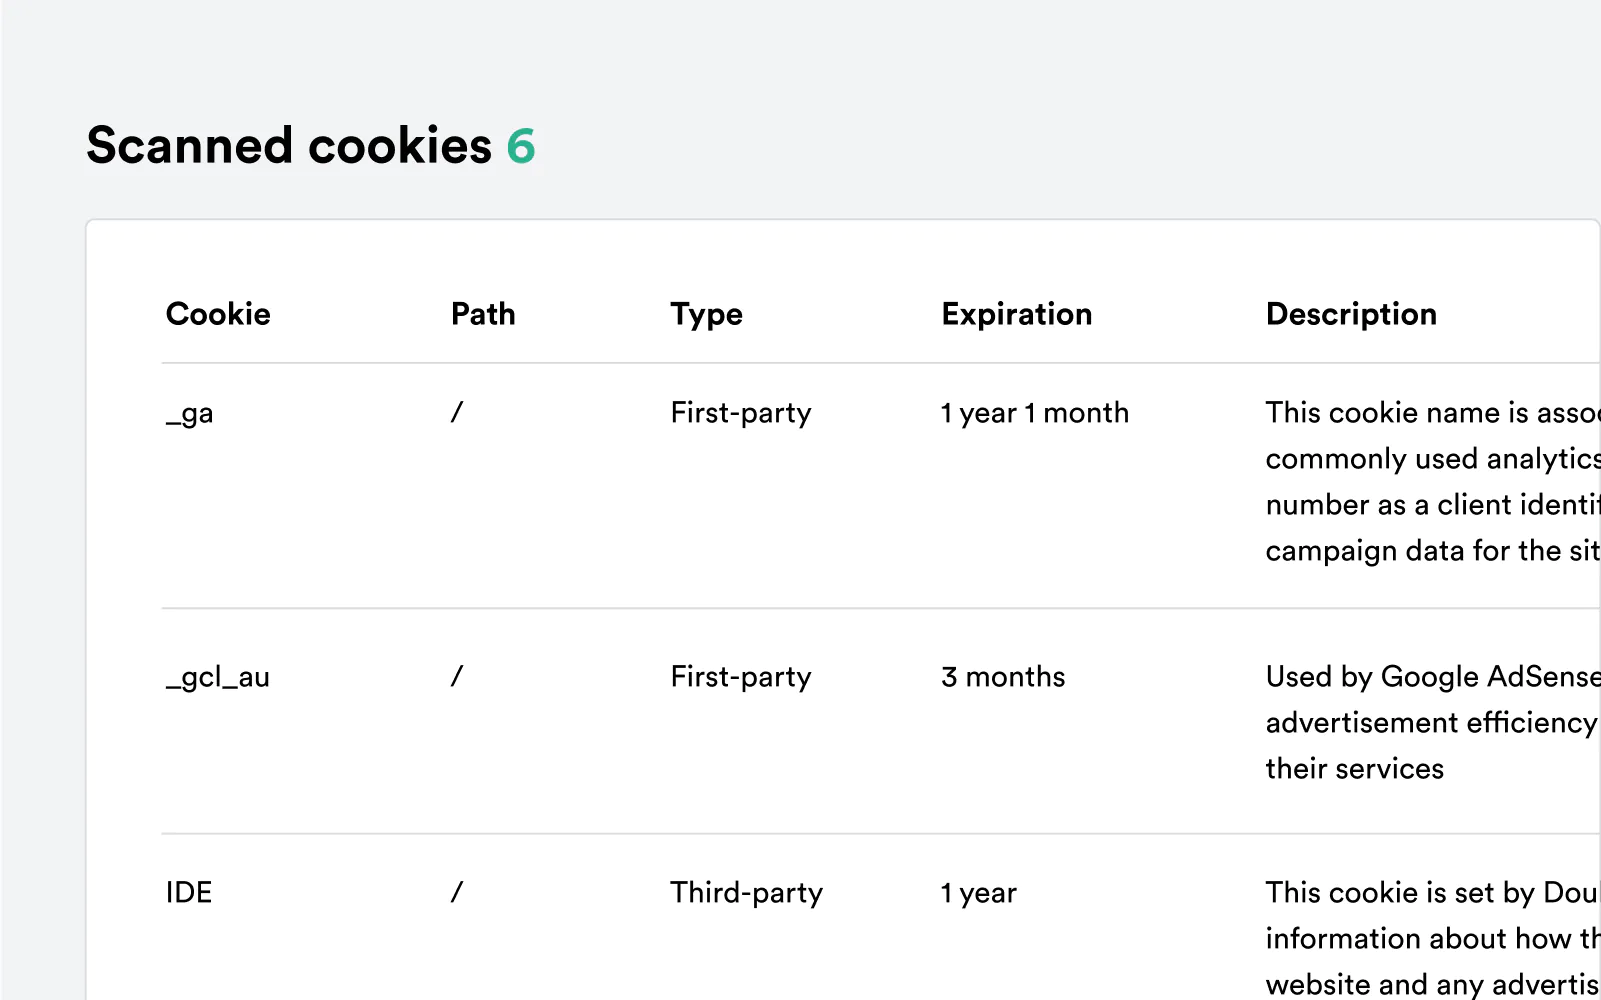
Before setting up consent mode v2, start by understanding your site's current tracking and cookie banner functionalities. Identify:
- Current tracking tags that rely on cookies (e.g., Google Analytics, Google Ads).
- Existing consent banners or management tools that may need adjustments.
If you’re considering our cookie solution, this process will be streamlined as we handle the nitty-gritty of auditing your existing Google Tag Manager setup and adjusting your tags accordingly. Alternatively, for more on auditing your tracking setup, check out Google's tag implementation guide.
2. Implement a consent management platform (CMP) for Webflow
A consent management platform (CMP) helps manage and store user consent preferences in alignment with GDPR. The CMP will communicate with Google’s consent mode to enable or disable tags based on user consent.
- If you’re using our cookie solution, you'll get a fully integrated CMP that automatically syncs with Google consent mode v2, ensuring all data capture is compliant.
- For other CMPs, ensure they support Google consent mode v2 integration, as not all platforms offer full compatibility.
Prefer not to worry about all of these technical details? Learn more about our cookie solution that handles all the setup for you in as little as 1 day!
3. Add Google Tag Manager (GTM) to your Webflow site
To control how Google tags behave based on consent status, you'll need to use Google Tag Manager (GTM). Here’s how to set it up:
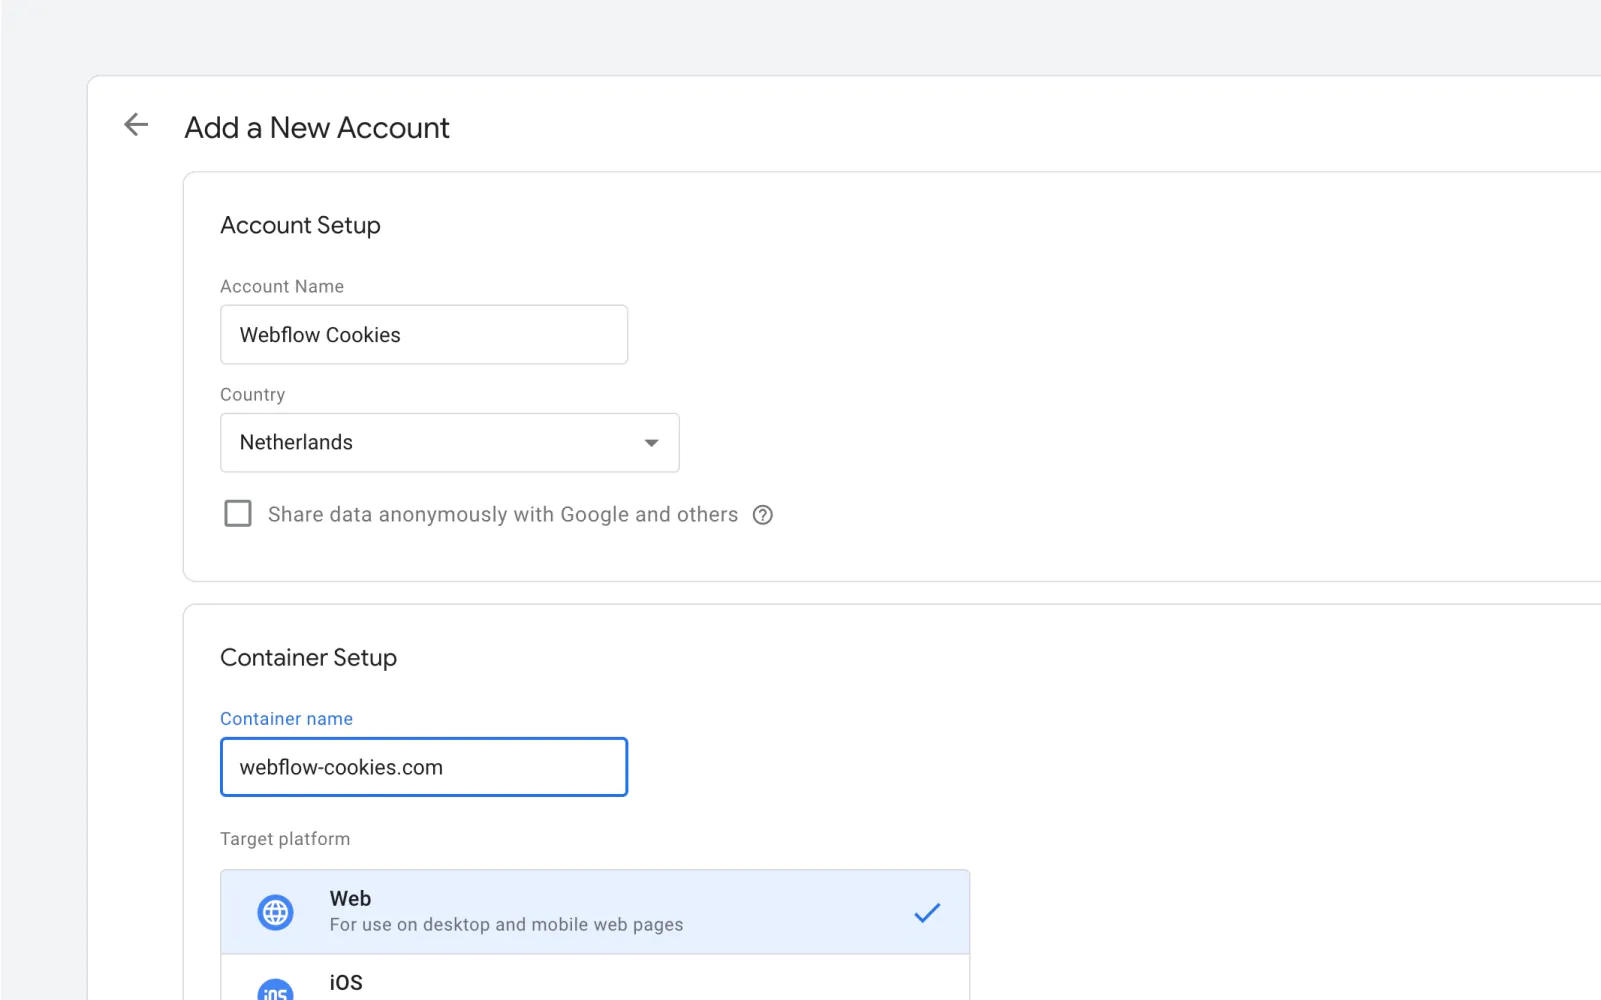
- Create a GTM account if you don’t have one yet, and generate a new container for your Webflow site.
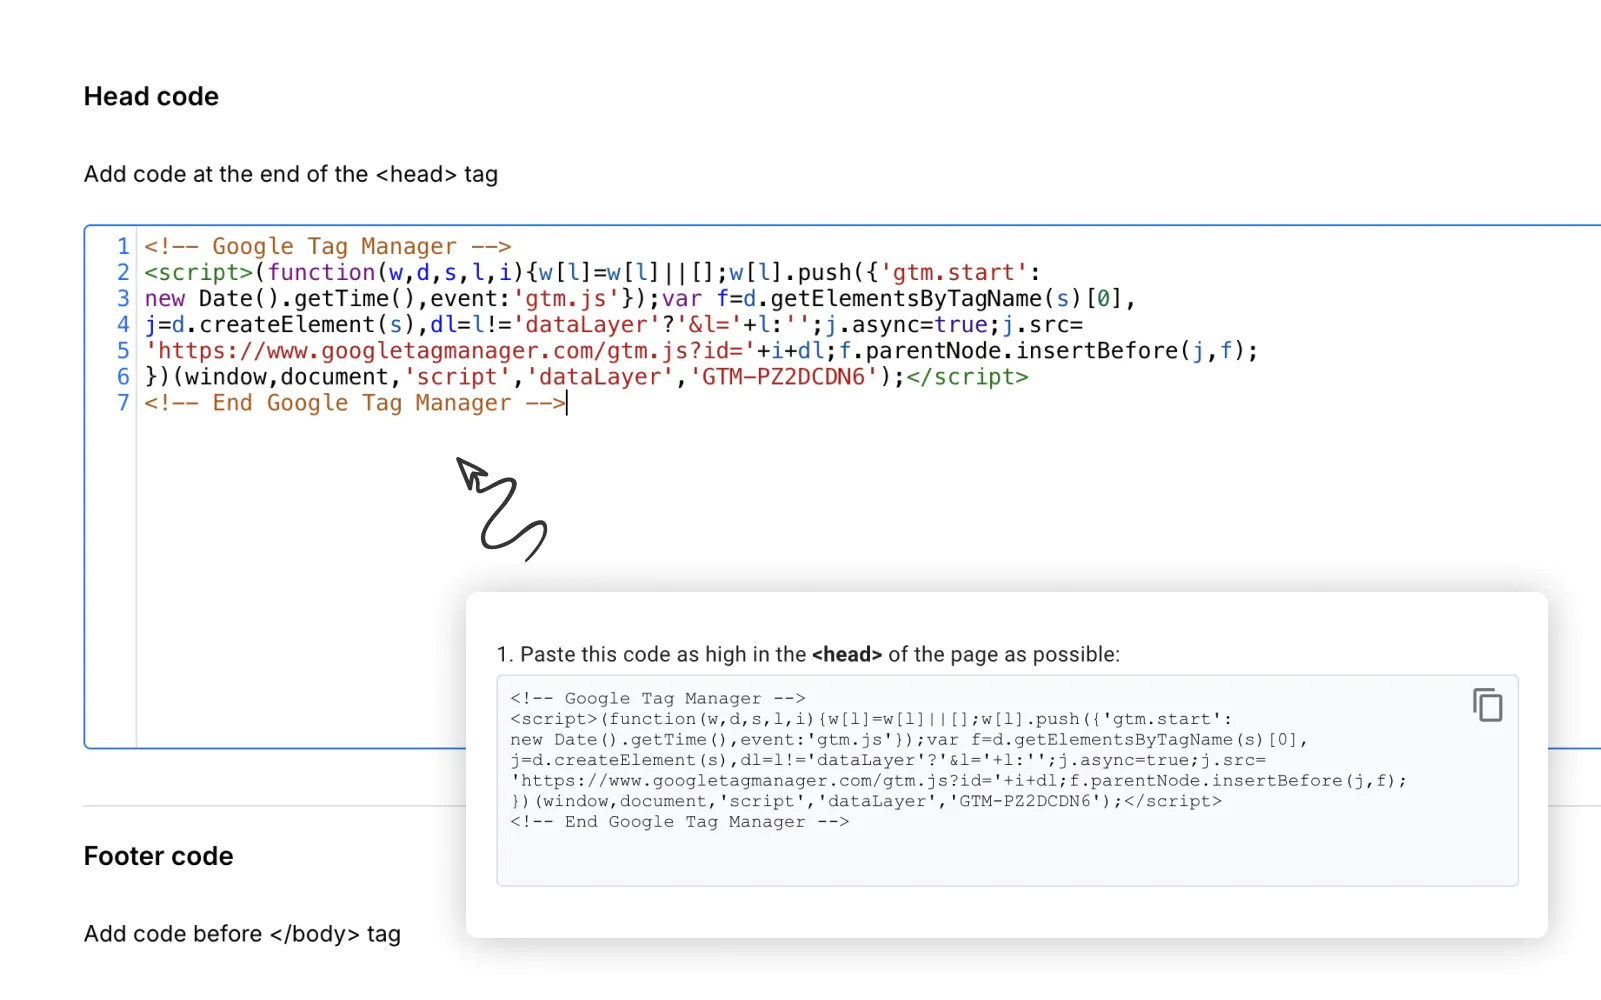
- Copy the GTM code snippet from the container and paste it into your Webflow site. Go to your project settings in Webflow, and under the custom code section, paste the GTM code in the head section as instructed by Google.
4. Enable consent overview
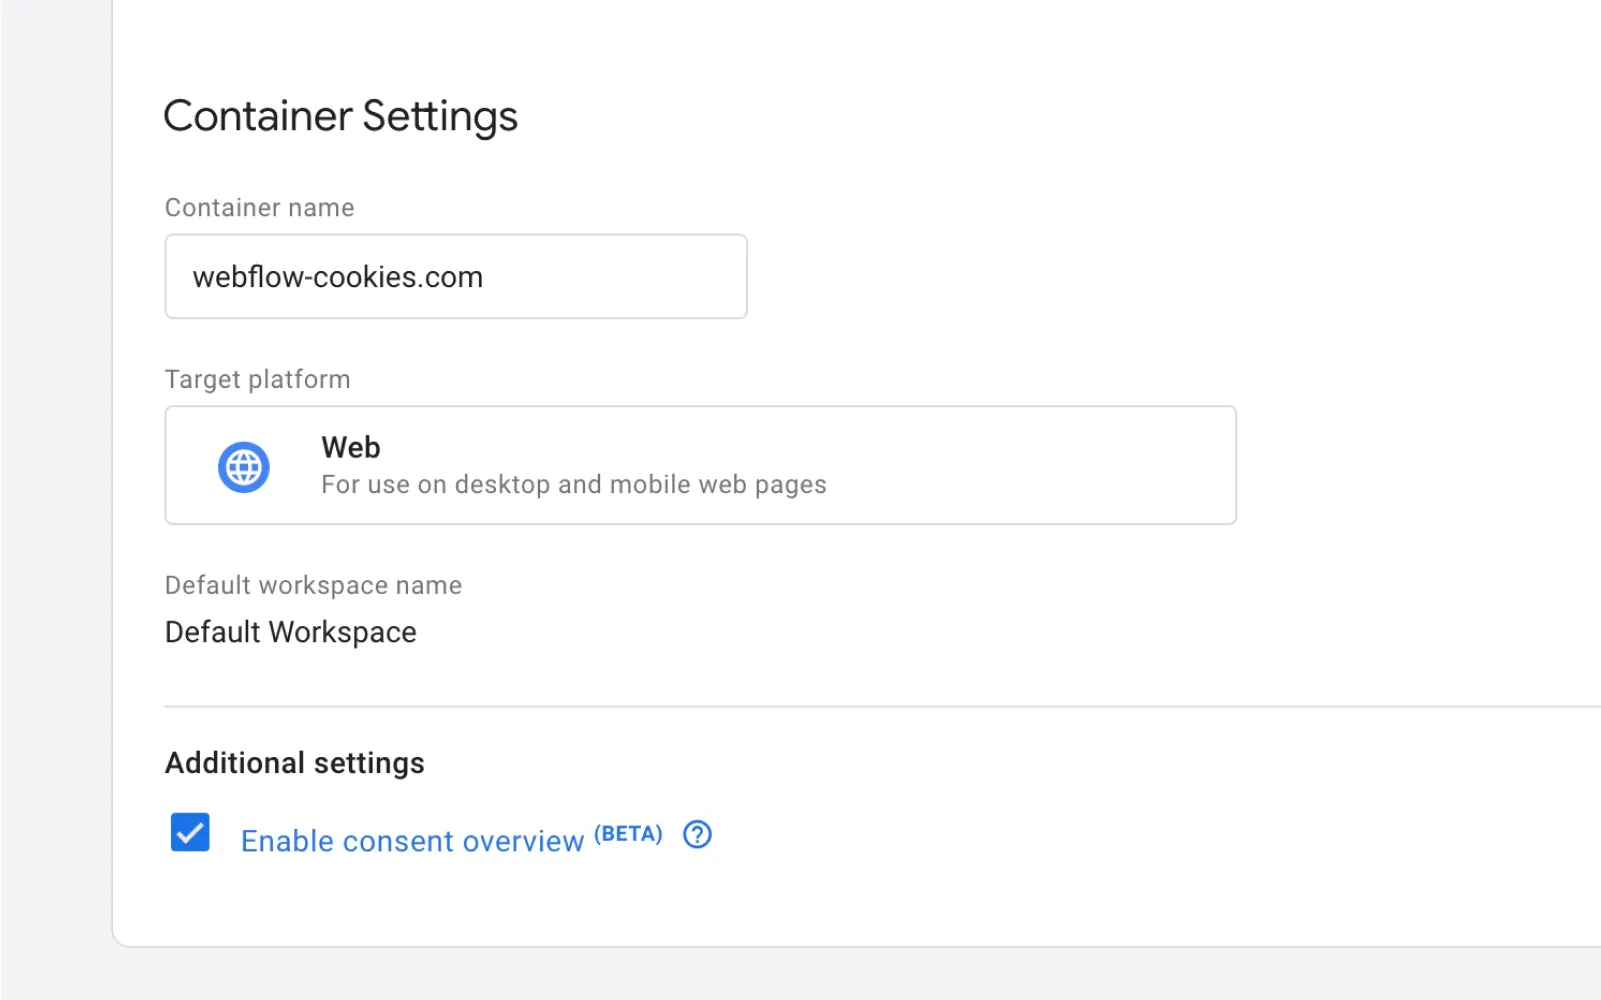
Within your GTM container, navigate to Admin > Container Settings and enable the 'enable consent overview (beta)' setting.
5. Configure consent mode tags in GTM
Within your GTM container, you'll need to set up tags for tracking while considering user consent:
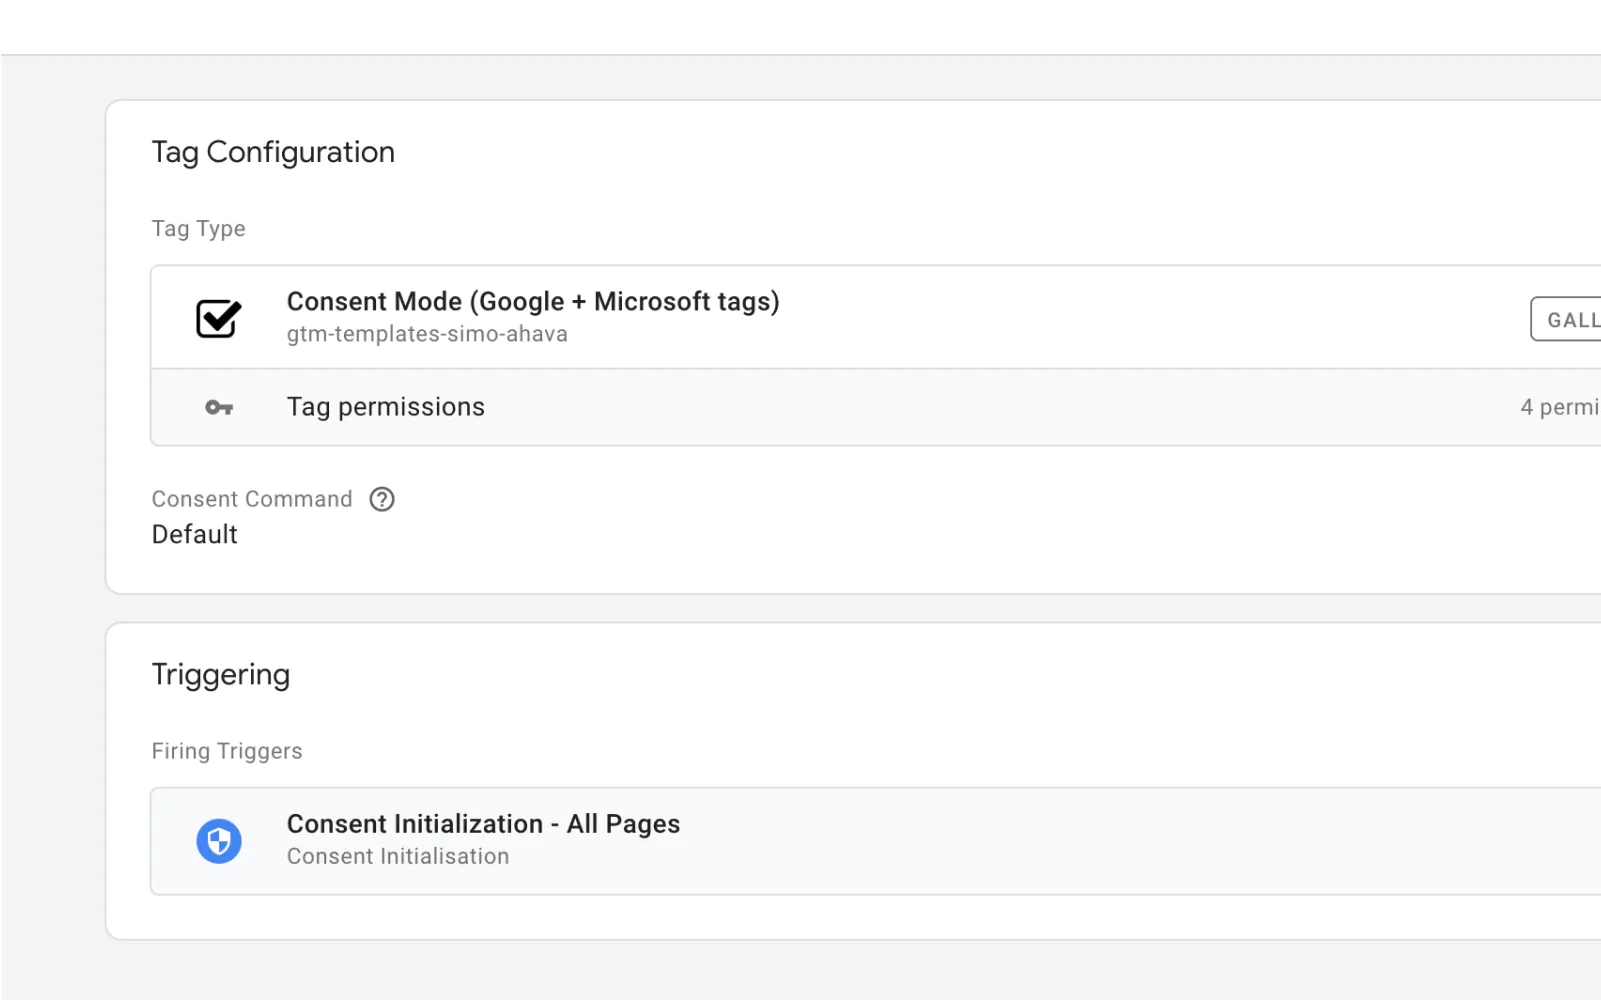
- Create a Consent Initialization tag: This tag fires before any other tags to manage the default user consent preferences.
- Navigate to tags > New > Choose a tag to begin set-up > Discover more tag types in the Community Template Gallery and search for the Consent Mode (Google + Microsoft tags) tag.
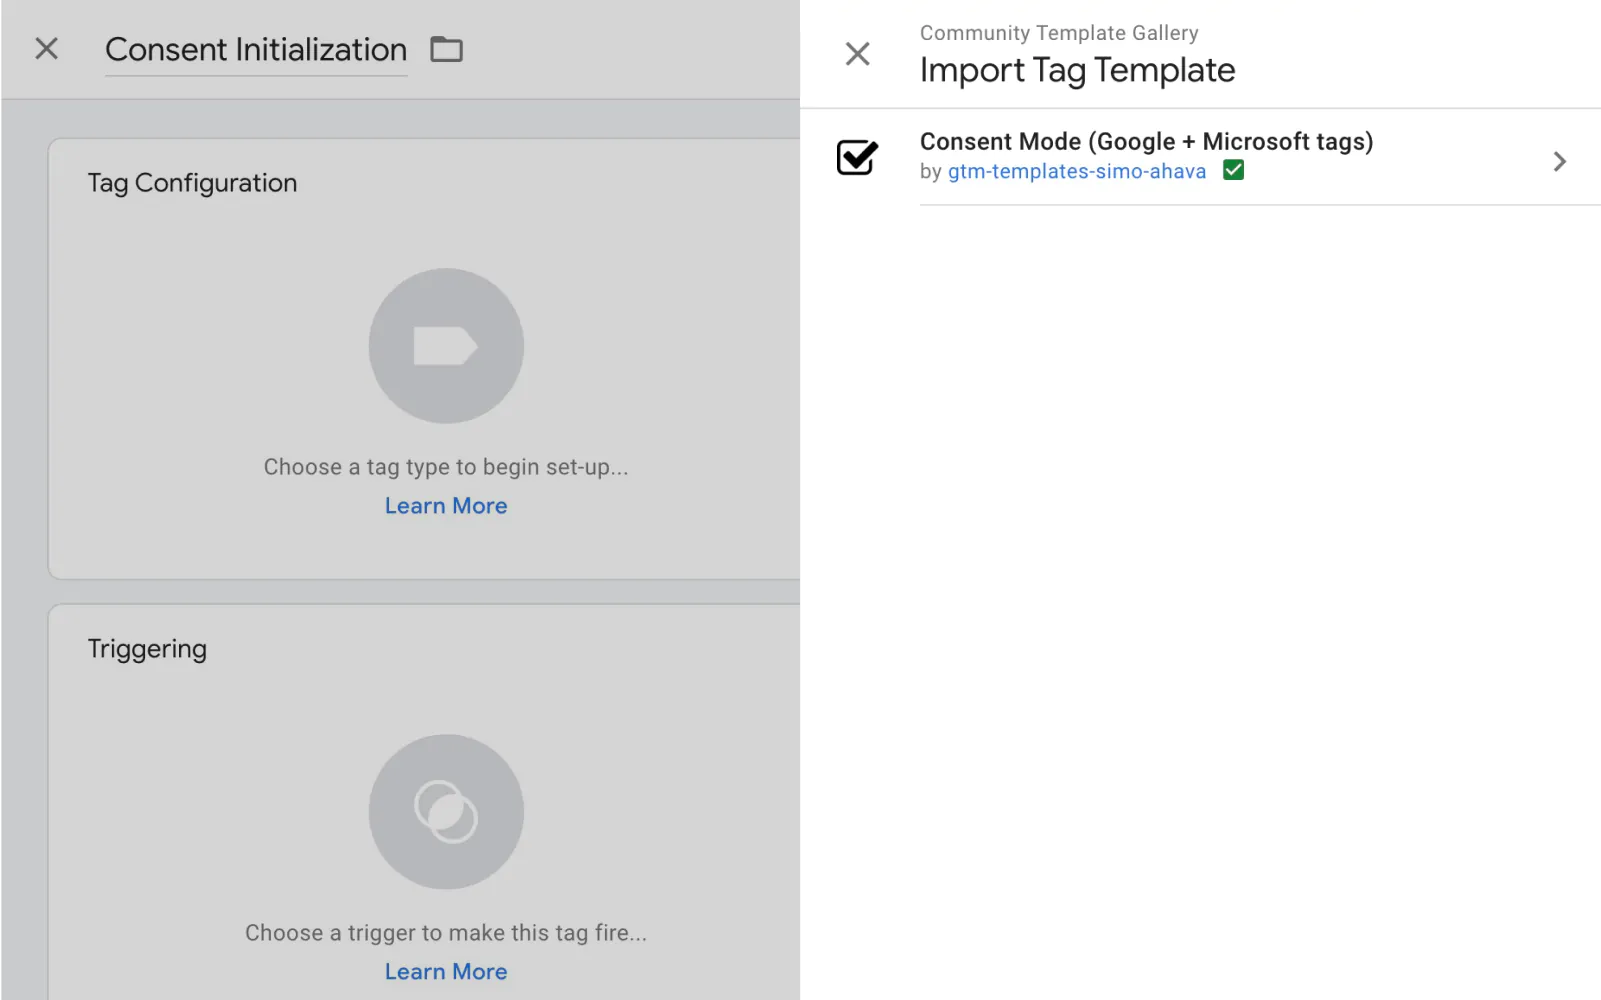
- Select Consent Initialization - All Pages as the trigger and configure the tag based on your site's consent preferences (e.g., denying ads, analytics and personalization consent states by default).
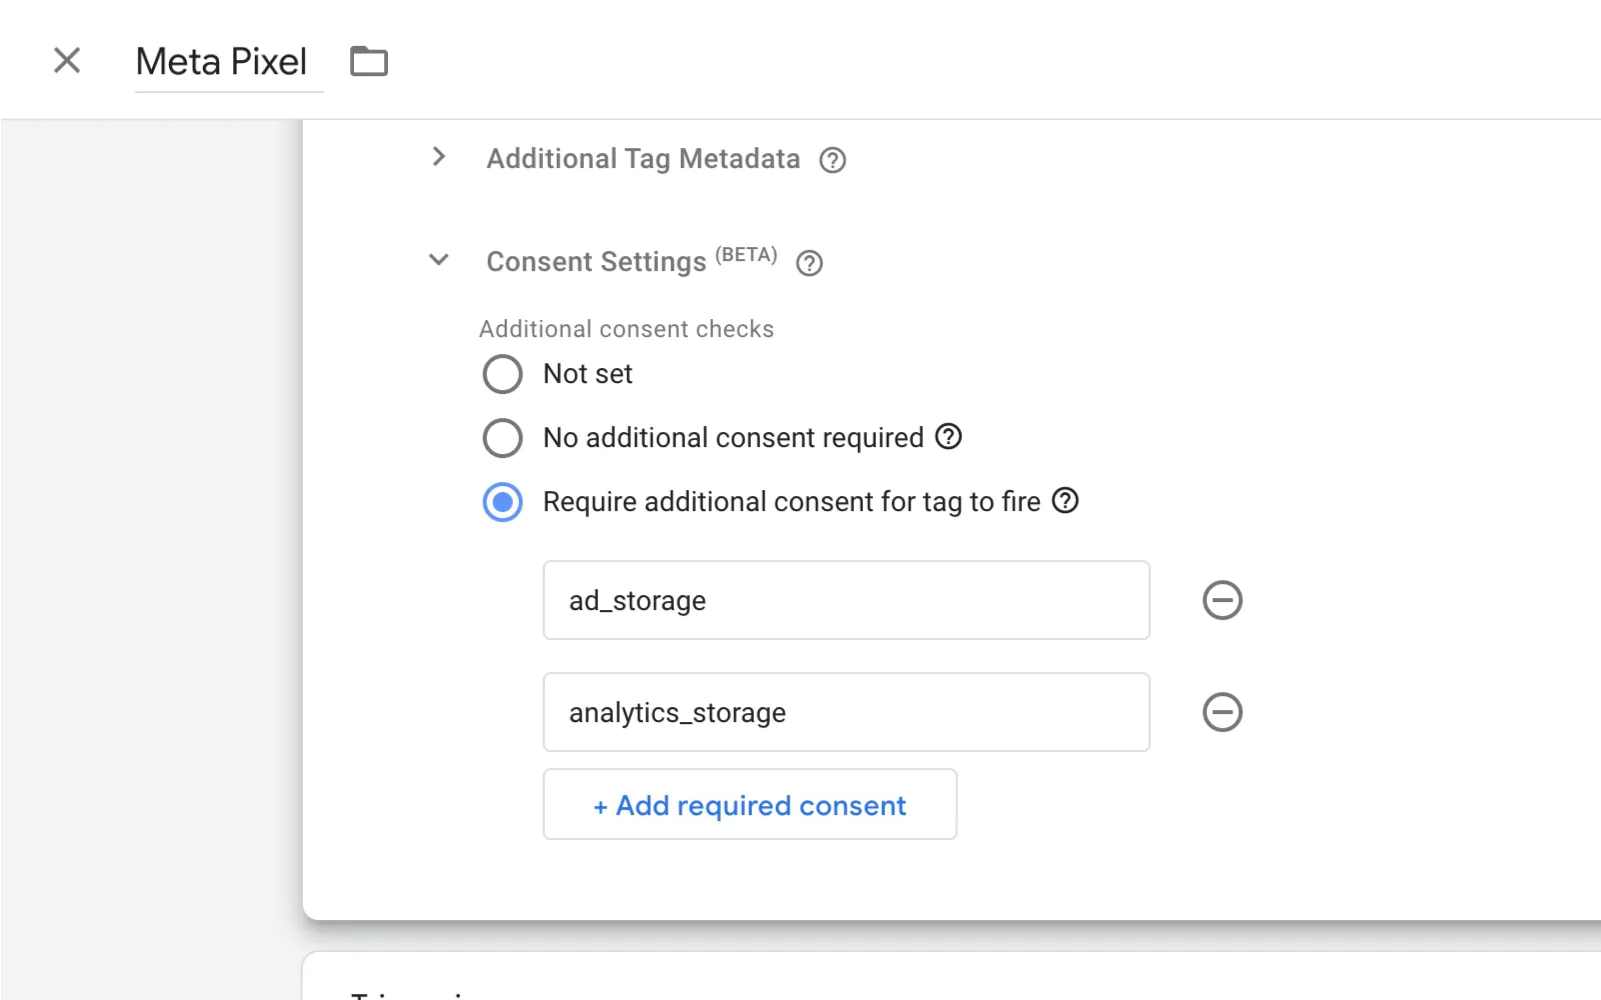
- Configure consent states for other tags: For other tags (e.g., Google Analytics, HubSpot tracking code, Meta Pixel), ensure each tag’s consent settings is configured to 'require additional consent for tag to fire' with the correct consent category.
6. Test the setup and adjust as necessary
After implementing your tags:
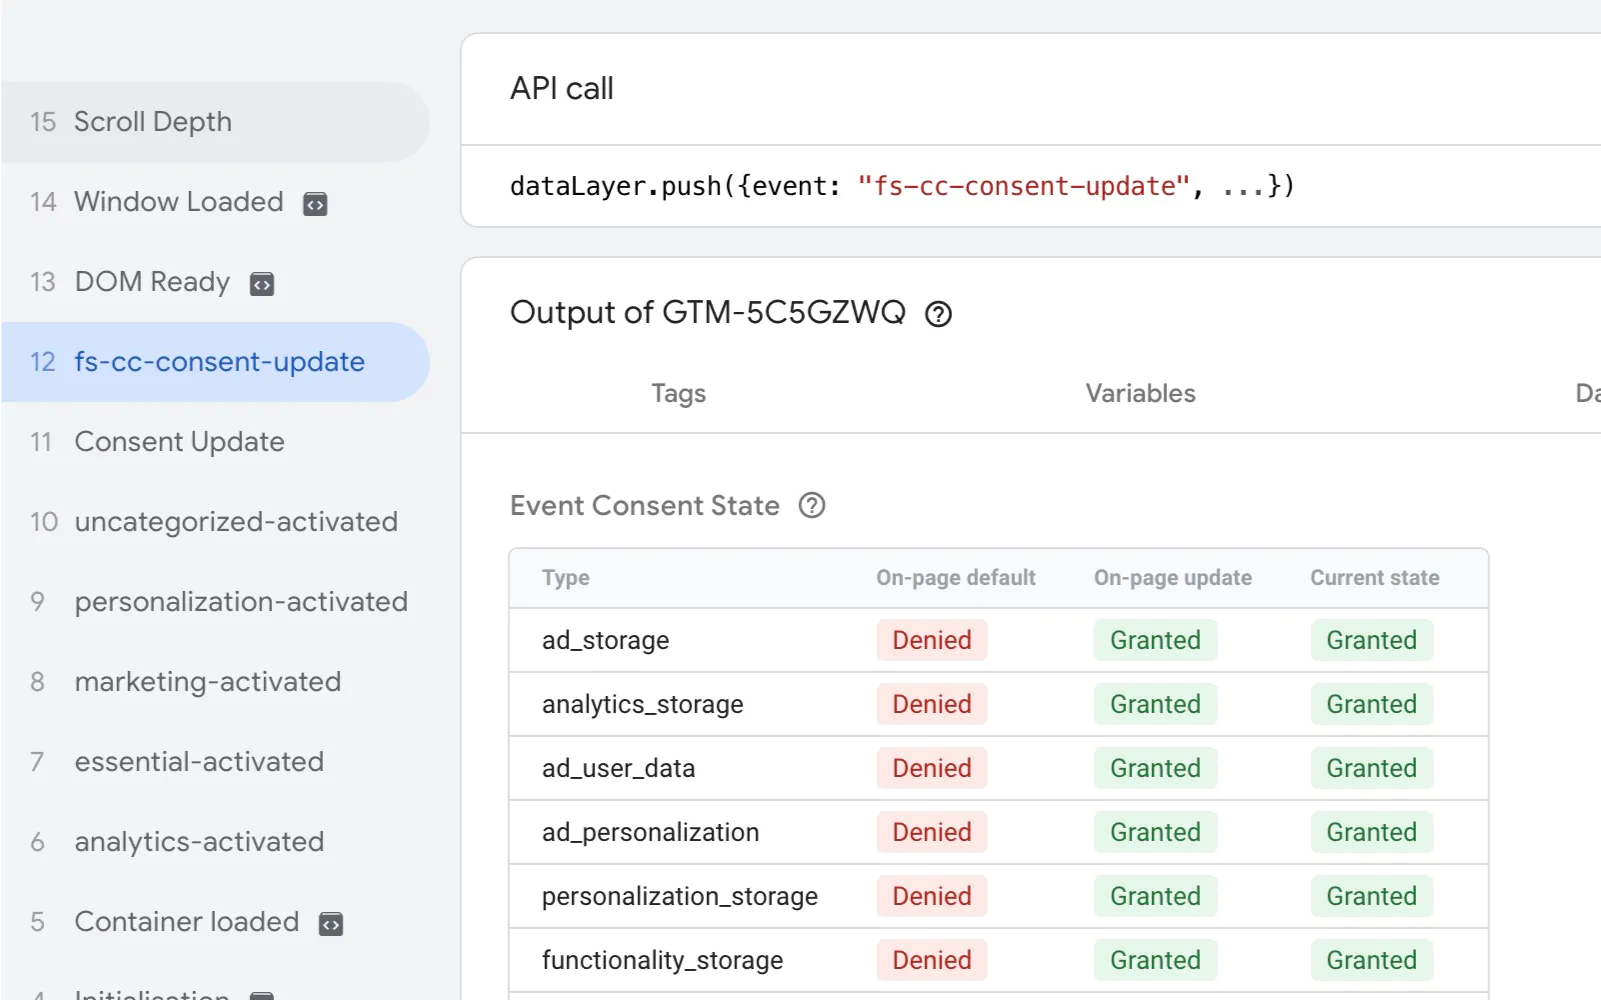
- Use GTM’s preview mode to ensure consent mode is functioning as expected.
- Check that tags fire only after obtaining user consent and that any denied consent prevents tags from collecting data.
If you're using our cookie solution, we take care of this for you, ensuring that the consent banner works seamlessly with GTM and that all tracking behaviors align with user preferences.
Key benefits of using our cookie solution for consent mode v2
Integrating Google consent mode v2 with Webflow may seem complicated, but our cookie solution makes it hassle-free:
- Automatic tag blocking & unblocking: Our banner automatically blocks tags until explicit user consent is given, ensuring GDPR compliance.
- Google consent mode v2 compatibility: No manual configuration is needed—our solution is designed to work with Google’s latest consent framework.
- Seamless integration with Webflow: As a tool built specifically for Webflow users, our cookie banner requires no coding and maintains site performance.
Want a hassle-free way to achieve compliance and manage your analytics seamlessly? Les us handle the technical details for you. With our cookie solution, we’ll get you set up in as little as 1 day.
Conclusion: Make consent mode v2 work for you
Setting up Google consent mode v2 on your Webflow site is an important step towards achieving GDPR compliance while maintaining your ability to collect critical analytics and ad performance data. While the process may seem daunting, with the right tools and guidance, you can achieve a seamless, compliant experience for your users. Our cookie solution, already trusted by 10,000 websites, ensures your Webflow site is equipped with all the tools you need for compliance, user experience, and business success.
